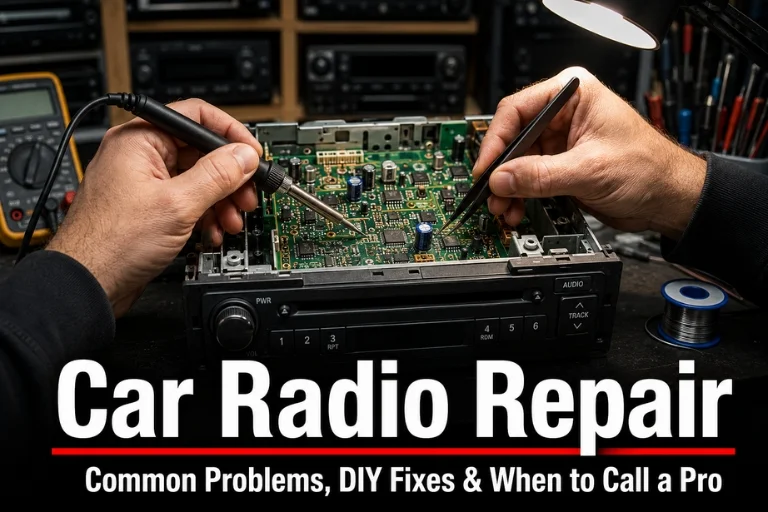

You are sitting in your car, turn the key, and reach for the radio—and nothing happens. Or maybe the sound cuts out at random, the touchscreen freezes, the display goes dark, or a CD decides it is never coming back out. Car radio problems range from a single blown fuse to a complete head unit failure, and knowing how to diagnose and address each one saves you time, money, and the frustration of driving in silence.
This complete guide covers everything about car radio repair—the most common problems and their causes, step-by-step DIY fixes you can handle yourself, what to expect from vintage car radio and classic car radio restoration, how to find reliable automotive radio repair near me, and when to call a professional versus when to pick up a screwdriver yourself.
Why Car Radio Repair Matters More Than Most Drivers Realize
A functioning radio or infotainment system is no longer simply about entertainment during a commute. Modern vehicles integrate the radio head unit into critical vehicle functions—climate control displays, backup camera feeds, navigation systems, phone connectivity, and vehicle diagnostic information all flow through the same central screen. When the radio unit fails, it frequently takes several of these secondary functions down with it.
For classic and vintage vehicle owners, the stakes are even higher. A vintage car radio is not simply a replaceable electronic component—it is an authentic period-correct element of the vehicle’s interior that directly affects the car’s collectible value and historical authenticity. Replacing it with a modern aftermarket unit eliminates that historical integrity permanently, making proper radio repair for cars of vintage origin an investment worth making correctly.
Most Common Car Radio Problems
Understanding the specific failure before attempting any repair prevents unnecessary parts replacement and ensures you address the actual root cause rather than a symptom.
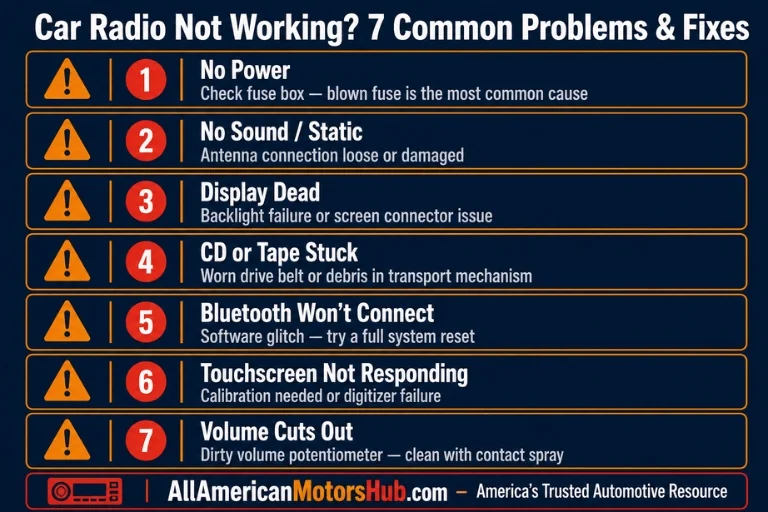
1. No Power — Radio Completely Dead
A completely dead radio that shows no display and produces no sound almost always begins with a blown fuse. Every car radio circuit is protected by one or more dedicated fuses in the vehicle’s fuse panel, and these fuses are designed to sacrifice themselves to protect the radio from electrical spikes.
Before assuming the radio itself has failed, locate your vehicle’s fuse panel—typically found under the dashboard on the driver’s side or in the engine bay—identify the radio fuse using the fuse panel diagram printed on the panel cover, and visually inspect it. A blown fuse has a clearly visible break in the metal strip inside the fuse body. Replace it with a fuse of identical amperage rating and test the radio before proceeding further.
If the replacement fuse immediately blows again, the circuit has a short somewhere — do not keep replacing fuses without investigating the underlying electrical fault, as doing so can cause wiring damage.
2. Poor Reception, Static, or No Signal
A radio that powers on but produces only static or extremely poor reception almost always has an antenna problem rather than an internal radio fault. The antenna connection on the rear of the radio head unit can work loose over time, particularly after other dashboard work has disturbed the wiring. The antenna mast itself may be broken, corroded at its base, or missing its internal copper wire core. On vehicles with in-glass antennas—where the antenna element is embedded in the windshield—a broken connection at the antenna amplifier module is a common failure point. Inspect the antenna connection first before assuming the tuner has failed.
3. Sound Cuts Out, Distortion, or One Speaker Silent
Distorted sound, sudden audio dropouts, or one speaker that produces no output while others work normally usually indicates a speaker wiring connection problem rather than a radio fault. Speaker wires pass through door jambs, under carpets, and behind panels throughout the vehicle—all locations where wires can chafe, corrode, or develop open circuits over time. Inspect speaker connections at both the radio harness end and at each individual speaker before condemning the head unit. A dirty or worn volume potentiometer—the internal control that regulates volume—can also cause intermittent audio dropouts and is addressed by spraying the control with electrical contact cleaner and cycling it repeatedly.
4. Display Blank or Backlight Failure
A radio that produces sound but shows no display, or a display that is extremely dim and only visible in darkness, has a backlight problem. In older radios, this is typically a burned-out display lamp—a simple replacement. In modern LED-backlit units, the cause is usually a failed LED backlight driver circuit on the radio’s main board. This repair typically requires component-level board repair and is generally beyond simple DIY capability.
5. CD or Tape Mechanism Jammed
Mechanical transport failures—a CD that will not eject, a tape deck that refuses to play—are particularly common in older head units. The most frequent cause is a worn rubber drive belt inside the transport mechanism that has lost elasticity and can no longer move the disc or tape correctly. Replacement belts are inexpensive, and the repair is achievable for a moderately skilled DIYer comfortable with precision disassembly. For a jammed disc, carefully pressing the eject button with the unit powered off while gently applying slight outward pressure to the disc sometimes releases it without requiring disassembly.
6. Touchscreen Not Responding or Responding Inaccurately
Touchscreen failures in modern infotainment units fall into two categories. Calibration errors — where the screen responds to touches but at incorrect positions — can often be resolved through a touchscreen calibration procedure in the system settings menu. Physical digitizer failure — where the screen does not respond to touch at all despite the display working normally — requires digitizer panel replacement, which involves careful disassembly of the head unit and is best handled by a professional familiar with the specific vehicle’s infotainment architecture.
7. Bluetooth or Software Glitches
Modern infotainment systems run embedded software and can develop software-related faults similar to any computer. A frozen screen, unresponsive menus, or persistent Bluetooth pairing failures are often resolved by a full system reset—disconnecting the negative battery terminal for 30 seconds, then reconnecting it. This clears the infotainment system’s temporary memory and forces a full software restart. If software problems persist after a reset, a dealer or specialist can perform a firmware update that addresses known software bugs in your specific unit.
DIY Car Radio Repair — Step-by-Step Process
For straightforward repairs including fuse replacement, antenna connection checks, and basic speaker wire diagnosis, here is the systematic approach that produces reliable results:
Step 1—Disconnect the Battery
Before working on any vehicle electrical component, disconnect the negative battery terminal to eliminate the risk of short circuits and prevent accidental airbag deployment if you are working near the dashboard. Always wait at least one minute after disconnection before proceeding.
Step 2 — Remove the Head Unit
Most modern head units are secured by either small screws hidden beneath trim panels or DIN removal keys — thin flat tools that slide into slots on either side of the radio face and release retaining clips inside the unit. Gently pry away any surrounding trim panels using plastic trim removal tools — never metal screwdrivers, which scratch surfaces. Once the radio is loosened, slide it partially out to access the wiring harness and antenna connection at the rear.
Step 3 — Inspect Connections
With the radio partially removed, visually inspect the main wiring harness connector, the antenna lead, and any accessory plugs such as the GPS antenna or microphone connection. Look for corrosion, bent pins, broken locking tabs, or connectors that are only partially engaged. Disconnect and firmly reconnect each plug to ensure positive electrical contact.
Step 4 — Test Before Full Reassembly
Before sliding the radio back into its mounting slot and replacing trim panels, reconnect the battery and power on the radio to verify the repair. Diagnosing a persistent problem is dramatically easier with the unit accessible rather than fully reinstalled.
Step 5 — Reassemble and Test All Functions
Once the repair is confirmed, slide the unit back into its mounting position, secure all fasteners, and carefully snap trim panels back into place. Test all radio functions — FM/AM reception, Bluetooth, USB, backup camera if applicable — before considering the repair complete.
Vintage Car Radio and Classic Car Radio Repair — A Different World
Owners of vintage and classic automobiles face a uniquely different challenge when it comes to radio repair for cars of that era. A vintage car radio from the 1950s, 1960s, or 1970s is not simply a functional component—it is an authentic piece of automotive history that directly contributes to a collector vehicle’s originality, show points, and market value. Replacing it with a modern aftermarket unit eliminates that historical integrity permanently.
Restoration of a classic car radio requires specialist knowledge that differs fundamentally from modern automotive electronics repair:
Vacuum Tube Testing and Replacement
Pre-transistor tube-type radios from the late 1940s through the mid-1960s require period-compatible vacuum tubes that demand specific testing equipment unavailable in standard electronics shops. Identifying a failing tube—distinguishing between one that reads as functional on a tube tester but produces intermittent noise under operating voltage—requires experience with tube-type circuit behavior that only dedicated vintage radio specialists possess.
Capacitor Replacement
Aged electrolytic capacitors are the single most common failure point in vintage car radio restoration. These components dry out and lose capacitance over decades, causing distortion, oscillation, weak volume, or complete audio failure. A thorough vintage radio restoration replaces every electrolytic capacitor in the unit regardless of whether individual caps have visibly failed—this is called “recapping” and is considered the baseline starting point for any meaningful classic car radio restoration.
Tuner Cleaning and Alignment
The mechanical tuning mechanism in a vintage car radio—involving a complex arrangement of gears, cams, and sliding contacts—accumulates decades of hardened lubricant, corrosion, and debris that causes the tuner to stick, skip, or refuse to track properly. Cleaning and re-lubricating the tuner mechanism, followed by realignment of the RF and IF circuits using a signal generator and alignment scope, restores accurate frequency reception and smooth tuning action.
AM/FM Conversion and Hidden Modernization
Many classic car radios were AM-only units—FM broadcasting was not yet widespread when many collector vehicles were new. Skilled restorers can add FM reception capability through careful internal modification that preserves the original external appearance entirely. The most sophisticated classic car radio restoration work goes further, integrating Bluetooth, auxiliary input, and USB connectivity invisibly within the original radio casing — allowing the driver to play modern audio sources while the dashboard retains its period-correct appearance.
Cosmetic Restoration
Beyond electronics, dial faces require careful cleaning to preserve original printing, chrome trim demands precise polishing without removing original plating, and knobs need cleaning and, in some cases, reproduction replacement when originals have cracked or faded. Dial pointer needles are often repainted to match original factory colors.
For enthusiasts undertaking a full classic car restoration alongside a vintage car radio project, ensuring the vehicle’s mechanical foundation is equally solid is essential. Explore our selection of used engines and used transmissions to support your complete restoration build with quality, inspected mechanical components.
How to Find Automotive Radio Repair Near Me
When the repair is beyond DIY capability — whether from complexity, specialized equipment requirements, or simply a lack of time — finding the right professional makes all the difference.
When searching for automotive radio repair near me, evaluate candidates using these specific criteria:
Automotive Audio Specialization
A general consumer electronics repair shop rarely has the vehicle-specific knowledge required for proper car radio repair. Wiring harness configurations, DIN mounting standards, CAN bus integration in modern vehicles, and the specific connector pinouts for each manufacturer’s wiring system are automotive-specific knowledge domains that consumer electronics technicians do not typically possess.
Brand Certification
Technicians certified by audio brands including Alpine, Kenwood, Pioneer, Sony, or JVC bring validated expertise in those specific product lines. For modern OEM infotainment systems—integrated factory units from Mercedes-Benz, BMW, Ford Sync, GM MyLink, or Toyota Entune — dealer technicians or specialists certified for that manufacturer’s specific system are the most reliable choice.
Classic and Vintage Experience
If you own a vintage car radio or classic car radio requiring restoration, confirm that the shop has documented, specific restoration experience before committing. A general electronics repair shop may inadvertently damage irreplaceable vintage components through unfamiliar handling. Ask for references, photos of completed restorations, and warranty terms on their restoration work.
Warranty on Repairs
Reputable car radio repair specialists stand behind their work with a written warranty covering both parts and labor. A repair that fails within weeks of completion and comes with no warranty protection means paying twice for the same problem.
Car Radio Repair Cost — What to Expect
Car radio repair costs vary considerably depending on the type of failure, the head unit involved, and whether professional service is required:
Fuse replacement: Essentially free — fuses cost under a dollar at any auto parts store.
Antenna replacement: $15 to $90 for the part depending on antenna type, plus one to two hours of labor at professional rates.
Speaker replacement: $25 to $150 per speaker for quality replacements, plus installation labor if not doing it yourself.
Head unit repair (professional): $50 to $300 depending on fault complexity and the shop’s labor rate.
Modern OEM infotainment repair: $200 to $600 or more at dealerships, which have access to manufacturer diagnostic tools and firmware update capabilities.
Vintage car radio restoration: Complete professional restoration of a vintage or classic car radio, including full recapping, tuner rebuild, alignment, and cosmetic restoration, typically ranges from $150 to $600 depending on the unit’s age, complexity, and condition.
For drivers comparing the cost of radio repair against other vehicle maintenance expenses, our timing belt replacement costs guide provides useful context on how audio system repairs compare to other significant vehicle service items in terms of long-term value.
Upgrading vs. Repairing — When Replacement Makes More Sense
Not every car radio repair is worth the cost. For modern units where the repair cost approaches or exceeds half the cost of a quality replacement unit, replacement is often the more economical long-term choice. Aftermarket head units from established brands offer features that many original factory units do not — Apple CarPlay, Android Auto, built-in navigation, Bluetooth audio, and USB charging.
However, for vintage car radio and classic car radio situations, this calculation is fundamentally reversed. An original factory radio in a 1960s muscle car or a 1950s American classic can add measurable value to the vehicle, while its absence or replacement with a modern unit removes that value permanently. In these cases, the restoration cost — even if it exceeds the market value of the radio itself as a standalone component — is justified by its contribution to the vehicle’s overall authenticity and collectibility.
For additional guidance on maintaining the full mechanical integrity of classic vehicles undergoing restoration, our engine swap guide walks through the complete process of selecting and installing period-appropriate or performance-upgrade engines to complement your classic car restoration project.
Preventing Future Car Radio Problems
A few straightforward practices significantly reduce the likelihood of radio failure:
Protect Against Voltage Spikes
Always disconnect the battery before jump-starting another vehicle or having your own jumped. Voltage spikes during jump-starting are one of the most common causes of sudden radio failure in modern vehicles.
Keep Moisture Out
Water intrusion through damaged door seals, sunroof drains, or windshield leaks is a major cause of radio circuit board corrosion. Address any water intrusion in the cabin immediately.
Use the Correct Fuses
If a radio fuse blows and you replace it with a higher-amperage fuse to prevent it from blowing again, you eliminate the protection the fuse provides. Always match the original fuse amperage exactly.
Handle CDs and Media Correctly
Never force a disc into a slot that shows any resistance. Inserting a damaged, warped, or foreign-object-contaminated disc into a CD mechanism is one of the most common causes of transport damage.
For a comprehensive approach to vehicle health that keeps all electrical and mechanical systems functioning reliably, our how many volts is a car battery guide explains how your vehicle’s electrical foundation affects every system, including the radio, and signs that your battery or charging system may be contributing to audio problems.
Conclusion
Car radio repair covers an enormous range of complexity—from a thirty-second fuse replacement that costs less than a dollar to a full professional restoration of a vintage car radio that requires weeks of specialized component-level work. Understanding where your specific problem falls on that spectrum, what the realistic repair options are, and when it makes sense to seek automotive radio repair near me versus handling it yourself is the foundation of every successful repair outcome.
Whether you are dealing with a frozen touchscreen in a modern infotainment system, a classic car radio in need of full recapping and alignment, or a stubborn CD that has decided it lives in your dash now, the systematic diagnostic approach outlined in this guide gives you the knowledge to address any car radio problem confidently and cost-effectively. For drivers restoring complete classic vehicles, explore our dedicated Ford Mustang engine and Dodge Charger engine product pages for quality used powerplants to complete your build alongside that perfectly restored radio.
Frequently Asked Questions
How do you repair a car radio that has no power?
The first step in any car radio repair for a completely dead unit is checking the dedicated radio fuse in your vehicle’s fuse panel. A blown fuse is the single most common cause of a radio with no power or display. Replace the fuse with an identical amperage unit and test. If the new fuse immediately blows again, a short circuit exists in the wiring, and professional diagnosis is needed.
What causes car radio static and poor reception?
Poor reception and static in car radio repair situations almost always point to an antenna problem rather than a failed tuner. The most common causes are a loose or disconnected antenna lead at the rear of the head unit, a broken or corroded antenna mast, or a failed amplifier module on vehicles with in-glass or powered antennas. Inspect the antenna connection before assuming the radio itself is faulty.
How do you find automotive radio repair near me?
To find automotive radio repair near me, search for car audio specialists — not general electronics repair shops — in your area. Evaluate candidates based on automotive audio specialization, brand certifications, customer reviews, and warranty terms. For dealer-level infotainment repair, the vehicle manufacturer’s dealership service department is the most reliable option for complex OEM system issues.
What is involved in vintage car radio restoration?
Vintage car radio restoration involves a comprehensive process, including replacing all aged electrolytic capacitors through full recapping, testing and replacing vacuum tubes in tube-type units, cleaning and realigning the mechanical tuner, cleaning and re-lubricating all controls and mechanisms, cosmetic restoration of dial faces and knobs, and optionally adding hidden FM, Bluetooth, or auxiliary input capability within the original casing.
Is a classic car radio worth repairing instead of replacing?
Yes, for most collector vehicles, a classic car radio is an authentic component that contributes to the vehicle’s originality and value. Replacing it with a modern aftermarket unit permanently eliminates that historical integrity. Professional classic car radio restoration preserves both the visual authenticity and the collectible value of the vehicle, making it a worthwhile investment even when the restoration cost exceeds the standalone value of the radio component.
How much does radio repair for cars typically cost?
Radio repair for cars ranges from virtually free for a fuse replacement to $50–$300 for typical professional electrical repairs, $200–$600 or more for modern OEM infotainment systems at dealerships, and $150–$600 for comprehensive vintage car radio restoration, including full recapping, tuner rebuild, alignment, and cosmetic work, depending on unit complexity and age.
Can you fix a frozen car touchscreen yourself?
Yes, in many cases. A frozen or unresponsive touchscreen is often caused by a software glitch resolvable through a full system reset—disconnecting the negative battery terminal for 30 seconds and reconnecting it. If the touchscreen responds but at incorrect positions, a calibration procedure in the system settings usually resolves this. Physical digitizer failure — where the screen shows no response at all — requires professional component replacement.
How do you remove a stuck CD from a car radio?
For a stuck CD, first try pressing the eject button with the unit powered off while applying gentle outward pressure to the disc. If the disc remains, the radio will need to be removed from the dashboard for access to the transport mechanism. Inside, a worn drive belt is the most common cause of transport failure. Replacement belts are inexpensive, and the repair is achievable for a careful DIYer with patience and precision tools.