Table of Contents
We’ve all been there—stuck on the side of the road or in the driveway with a car that just won’t start. Maybe it’s the battery, maybe the engine is done for, or maybe something much simpler. But here’s the truth: knowing your car components and tools—like the serpentine belt, brake lines, TPMS, Battery Starter and even something as basic as your radiator cap—can save you thousands in repairs and keep your ride on the road longer.
If you’re already shopping for a used engine or used transmission, this guide will help you understand the components that commonly fail, what tools you need to diagnose them, and how to spot red flags before things get worse.
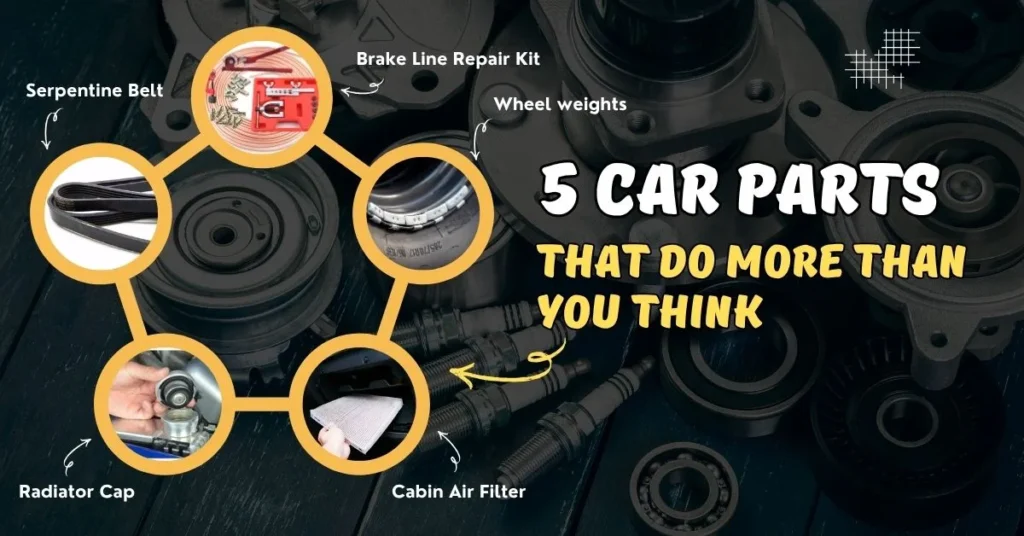
5 Car Parts That Do More Than You Think

Brake Line Repair Kit
A brake line repair kit is used to fix damaged or leaking brake lines in a vehicle’s hydraulic brake system. Brake lines are steel or stainless steel tubes that carry brake fluid from the master cylinder to the brake calipers or wheel cylinders, enabling the brakes to function. Damage to these lines, such as corrosion, cracks, or punctures, can cause brake fluid leaks, reducing braking efficiency or leading to brake failure. A repair kit provides a temporary or permanent solution to restore the integrity of the brake line without replacing the entire line.
Function of a Brake Line Repair Kit:
- Seal Leaks: The kit typically includes components like compression fittings, unions, or replacement tubing to seal small leaks or damaged sections of the brake line, preventing brake fluid loss.
- Restore Brake Pressure: By repairing the brake line, the kit ensures that brake fluid can flow properly, maintaining hydraulic pressure needed for effective braking.
- Temporary or Permanent Fix: Depending on the kit and damage, it can provide a quick roadside fix or a more durable repair to keep the brake system operational until a full replacement is possible.
- Prevent Air Ingress: A damaged brake line can allow air to enter the system, causing spongy brakes. The repair kit helps maintain a sealed system, keeping air out.
- Cost-Effective Solution: It avoids the need for immediate full brake line replacement, which can be labor-intensive and expensive, especially for older vehicles.
Common Components of a Brake Line Repair Kit:
- Compression Fittings: Used to connect two sections of brake line or seal a damaged area.
- Replacement Tubing: Short sections of compatible brake line material (e.g., steel or copper-nickel) to replace a damaged segment.
- Unions or Couplers: Join two brake line ends securely.
- Flaring Tools: Some kits include tools to flare the ends of cut brake lines for a proper seal.
- Clamps or Adapters: Secure the repaired section in place.
- Sealing Tape or Compounds: Occasionally included for additional leak prevention.
How It Works:
- Identify Damage: Locate the leak or damaged section of the brake line (e.g., corrosion, crack, or puncture).
- Cut and Remove: Use a tubing cutter to remove the damaged portion of the brake line.
- Prepare the Line: If needed, flare or deburr the cut ends to ensure a smooth, leak-free connection.
- Install Repair Components: Attach compression fittings, unions, or a replacement brake line segment from the kit to reconnect the system.
- Test the System: Refill the brake fluid, bleed the brake lines to remove air, and test the brakes to ensure proper function and no leaks.
Serpentine Belt
A serpentine belt is a single, continuous belt in a vehicle’s engine that drives multiple peripheral components, such as the alternator, power steering pump, air conditioning compressor, water pump, and sometimes other accessories like the air pump or supercharger. Unlike older systems with multiple belts, the serpentine belt simplifies the design by using one long belt that snakes through a series of pulleys, hence the name “serpentine.”
Function of a Serpentine Belt:
- Power Transmission: Transfers rotational energy from the engine’s crankshaft to various components, enabling them to function. For example:
- Alternator: Charges the battery and powers electrical systems.
- Power Steering Pump: Assists in steering control.
- Air Conditioning Compressor: Drives the A/C system for cabin cooling.
- Water Pump: Circulates coolant to prevent engine overheating.
- Efficiency: Replaces multiple V-belts, reducing complexity, weight, and maintenance while improving reliability.
- Tension Maintenance: Works with a tensioner pulley (automatic or manual) to maintain proper tension, ensuring efficient power transfer and preventing slippage.
Importance:
- Critical for Engine Operation: If the belt fails, components like the alternator or water pump stop working, potentially causing battery drain, overheating, or loss of power steering.
- Wear and Maintenance: Over time, serpentine belts can crack, fray, or glaze due to heat, age, or misalignment. Regular inspection (every 30,000–60,000 miles) and replacement (typically every 60,000–100,000 miles, depending on the vehicle) are essential.
Signs of a Failing Serpentine Belt:
- Squealing or Chirping Noises: Indicates slippage or misalignment.
- Visible Wear: Cracks, fraying, or missing ribs on the belt.
- Component Failure: Dimming lights (alternator), overheating (water pump), or heavy steering (power steering pump).
- Belt Slippage: Caused by improper tension, worn pulleys, or oil contamination.
Radiator Cap
A radiator cap is a small but critical component of a vehicle’s cooling system, typically located on the radiator or a coolant reservoir. It seals the cooling system and regulates its pressure to ensure efficient operation and prevent overheating.
Function of a Radiator Cap:
- Pressure Regulation:
- The cap maintains optimal pressure (typically 0.7–2.1 bar or 10–30 psi, depending on the vehicle) in the cooling system.
- Higher pressure raises the boiling point of the coolant, allowing it to absorb and transfer heat more effectively without boiling.
- Sealing the System:
- It prevents coolant leaks and keeps air out, maintaining a closed system to avoid air pockets that reduce cooling efficiency.
- Vacuum Relief:
- As the engine cools, a vacuum forms in the system. The cap’s vacuum relief valve allows air or coolant from the reservoir to enter, preventing system collapse or damage.
- Safety Release:
- If pressure exceeds safe levels (e.g., due to overheating), the cap’s pressure relief valve releases excess pressure to prevent damage to the radiator, hoses, or other components
Components of a Radiator Cap:
- Pressure Spring and Valve: Maintains and regulates system pressure.
- Vacuum Relief Valve: Allows air or coolant to enter as the system cools.
- Gasket/Seal: Ensures a tight, leak-proof seal.
- Cap Body: Typically metal or plastic, designed to fit the radiator or reservoir neck.
Importance:
- Prevents Overheating: By raising the coolant’s boiling point, it ensures the engine stays within safe operating temperatures.
- Protects Components: Maintains proper pressure to prevent damage to the radiator, hoses, and water pump.
- Coolant Retention: Minimizes coolant loss, reducing the need for frequent top-offs.
Signs of a Faulty Radiator Cap:
- Coolant Leaks: Visible around the cap or under the vehicle.
- Overheating: Due to pressure loss, causing coolant to boil prematurely.
- Swollen or Burst Hoses: From excessive pressure if the relief valve fails.
- Low Coolant Levels: Caused by leaks or improper sealing.
- Hiss or Steam: Indicates the cap isn’t holding pressure correctly.
Note: Never open the radiator cap when the engine is hot, as pressurized steam or coolant can cause severe burns.
Cabin Air Filter
A cabin air filter is a component in a vehicle’s ventilation system that cleans the air entering the passenger compartment through the heating, ventilation, and air conditioning (HVAC) system. It traps dust, pollen, pollutants, and other contaminants to improve air quality inside the vehicle.
Function of a Cabin Air Filter:
- Air Purification:
- Filters out dust, pollen, mold spores, pet dander, and other airborne particles, improving air quality for passengers.
- Reduces allergens, benefiting those with respiratory issues or allergies.
- Odor and Pollutant Reduction:
- Some filters (e.g., activated charcoal or carbon filters) absorb odors, exhaust fumes, and harmful gases like volatile organic compounds (VOCs).
- Protects HVAC System:
- Prevents debris from clogging the blower motor, evaporator, or heater core, ensuring efficient operation of the heating and cooling systems.
- Improves Airflow:
- A clean filter maintains proper airflow through the HVAC system, ensuring effective heating, cooling, and defrosting.
Types of Cabin Air Filters:
- Particulate Filters: Trap dust, pollen, and larger particles; made of pleated paper or synthetic materials.
- Activated Carbon/Charcoal Filters: Include a carbon layer to absorb odors and gases in addition to trapping particles.
- HEPA Filters (less common): High-efficiency filters that capture smaller particles, used in some premium vehicles.
Importance:
- Passenger Comfort: Provides cleaner, fresher air, reducing irritation from allergens or smells.
- Health Benefits: Minimizes exposure to pollutants, especially in urban areas with high traffic or poor air quality.
- System Longevity: Protects HVAC components from debris, reducing wear and repair costs.
- Visibility and Safety: Ensures proper airflow for defrosters, maintaining clear windows in adverse weather.
Signs of a Dirty or Clogged Cabin Air Filter:
- Reduced Airflow: Weak air output from vents, even on high fan settings.
- Unpleasant Odors: Musty or foul smells when the HVAC is on.
- Poor HVAC Performance: Inefficient heating, cooling, or defrosting.
- Increased Allergies: More dust or allergens in the cabin, causing discomfort.
- Noisy Blower Motor: Straining sounds due to restricted airflow.
Wheel weights
Wheel weights are small, precisely measured weights attached to a vehicle’s wheel rim to balance the wheel and tire assembly. They counteract uneven weight distribution, ensuring smooth rotation and preventing vibrations during driving.
Function of Wheel Weights:
- Balance the Wheel-Tire Assembly:
- Wheels and tires are not perfectly uniform due to manufacturing imperfections or uneven tread wear. Wheel weights offset these imbalances to ensure even rotation.
- Proper balance reduces vibrations, improving ride comfort and handling.
- Prevent Component Wear:
- Unbalanced wheels cause excessive stress on suspension components, bearings, and tires, leading to premature wear.
- Improve Safety and Performance:
- Balanced wheels enhance vehicle stability, steering precision, and braking performance, especially at higher speeds.
- Reduce Tire Wear:
- Even weight distribution prevents uneven tire wear, extending tire life.
Types of Wheel Weights:
- Clip-On Weights:
- Attached to the rim’s flange (edge) using a metal clip.
- Common for steel or alloy wheels with a lip.
- Made of lead, zinc, or steel (lead is less common due to environmental concerns).
- Adhesive (Stick-On) Weights:
- Attached to the inner surface of the wheel using adhesive backing.
- Used for alloy wheels where clip-on weights may damage the rim or are aesthetically undesirable.
- Often segmented for precise placement.
- Materials:
- Lead: Traditional but phased out in many regions due to toxicity.
- Zinc or Steel: Environmentally friendly alternatives now widely used.
- Specialty Weights:
- Low-profile or coated weights for aesthetic purposes or to fit specific rim designs.
How Wheel Weights Are Used:
- Balancing Process:
- The wheel-tire assembly is mounted on a balancing machine, which spins the wheel to detect imbalances.
- The machine indicates where and how much weight is needed.
- Technicians attach the appropriate wheel weights (clip-on or adhesive) to the rim.
- The wheel is re-spun to confirm balance.
- Static vs. Dynamic Balancing:
- Static Balancing: Corrects vertical imbalance (up-and-down shake) using one weight.
- Dynamic Balancing: Corrects side-to-side and vertical imbalances, often requiring weights on both the inner and outer rim.
- When Needed:
- During new tire installation or tire rotation.
- After wheel repair (e.g., bent rim correction).
- If vibrations or uneven tire wear are noticed.
Signs of Improper Wheel Balance:
- Vibrations: Steering wheel or seat shaking, especially at certain speeds (e.g., 50–70 mph).
- Uneven Tire Wear: Scalloping or cupping patterns on tire treads.
- Steering Issues: Pulling or wandering due to unbalanced wheels.
- Noise: Humming or thumping sounds from the wheels.
Quick Reference Table: When to Replace What
| Component | Why It Matters | Check/Replace |
| Brake Line Kit | Restores braking pressure | At signs of leaks/spongy brakes |
| Serpentine Belt | Powers multiple engine parts | Every 60K–100K miles |
| Radiator Cap | Maintains cooling system pressure | Every 2–3 years |
| Cabin Air Filter | Improves interior air quality | Every 12K–15K miles |
| Wheel Weights | Keeps tires balanced, protects drivetrain | With every tire change |
Is Windshield Wiper Fluid Flammable?

Windshield wiper fluid, also known as windshield washer fluid, is generally not highly flammable under normal conditions, but its flammability depends on its composition, particularly the presence of alcohol. Let’s break it down to clarify why the answer might surprise you.
Just like changing transmission fluid [How to Do a Transmission Fluid Change], keeping your windshield wiper fluid topped off is a basic but vital part of routine maintenance.
Composition of Windshield Wiper Fluid:
- Water: The primary component in most wiper fluids, which is non-flammable.
- Alcohol: Many formulations contain methanol, ethanol, or isopropanol to lower the freezing point (for winter use) and improve cleaning. These alcohols are flammable.
- Methanol: Commonly used in high concentrations (20–40% in some winter blends), highly flammable with a flash point around 11–12°C (52–54°F).
- Ethanol: Less common, but also flammable, with a flash point around 13°C (55°F).
- Detergents/Surfactants: Added for cleaning, typically non-flammable.
- Other Additives: Dyes or antifreeze agents, usually in small amounts and not significantly flammable.
Is It Flammable in Practical Use?
- Under Normal Conditions: Windshield wiper fluid is unlikely to catch fire during typical use (e.g., refilling the reservoir or spraying it on the windshield). The water content dilutes the alcohol, and the fluid is not exposed to ignition sources in normal operation.
- Extreme Scenarios:
- High Heat or Sparks: In rare cases, such as a hot engine compartment with a leaking reservoir near a spark (e.g., from a faulty wire), concentrated alcohol vapors could ignite.
- High-Alcohol Blends: Winter-grade fluids with high methanol content (e.g., 40% or more) are more flammable than summer blends (often <10% alcohol).
- Spills or Storage: Large spills in a confined, hot area with poor ventilation could produce flammable vapors, especially with methanol-based fluids.
Why It’s Surprising:
- Perception of Safety: Many assume wiper fluid is entirely non-flammable due to its water base and everyday use, but the alcohol content introduces a flammability risk that’s often overlooked.
- Label Warnings: Some wiper fluid containers include flammability warnings, which can surprise users who think of it as “just water with soap.”
- Context Matters: While not as flammable as gasoline (flash point ~–40°C or –40°F), certain wiper fluids can ignite under conditions that seem unlikely for a car maintenance product.
Safety Precautions:
- Storage: Store wiper fluid in a cool, well-ventilated area away from heat sources or open flames.
- Handling: Avoid spilling near hot engine parts or electrical components. Clean up spills promptly.
- Check Composition: Look for the fluid’s alcohol content on the label. Summer blends (low alcohol) are less flammable than winter blends (high alcohol).
- No Smoking: Avoid smoking or using open flames when refilling the reservoir.
- Disposal: Dispose of unused or old fluid according to local regulations, as methanol-based fluids are toxic and may have environmental restrictions.
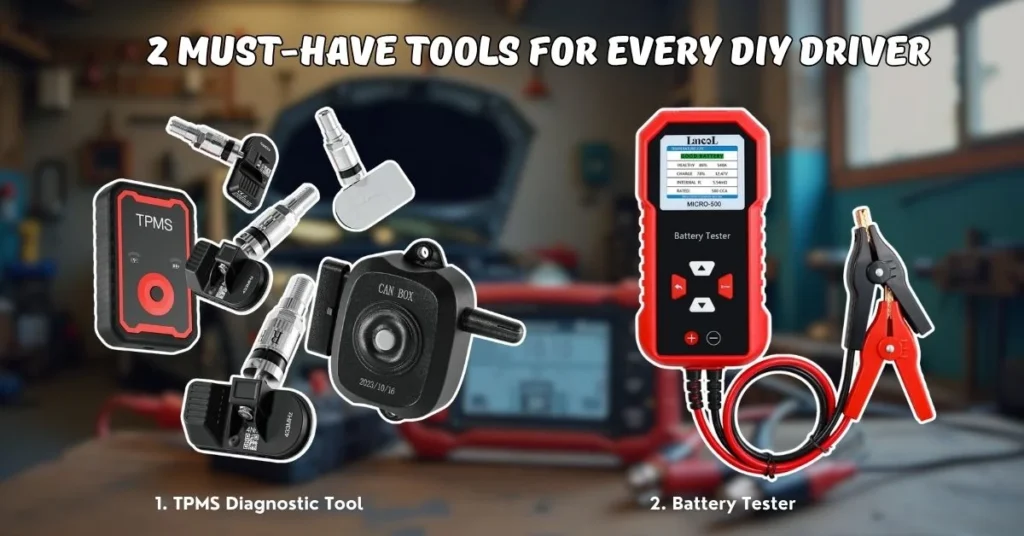
2 Tools That Every DIY Driver Should Own

For DIY drivers, owning the right tools can make vehicle maintenance easier, safer, and more cost-effective. Two essential tools that every DIY driver should consider are a TPMS (Tire Pressure Monitoring System) tool and a battery tester. Here’s why these tools are invaluable, along with their functions and benefits:
1. TPMS Tool
What It Is: A TPMS tool is a diagnostic device used to read, reset, or program tire pressure monitoring system sensors, which monitor tire pressure and alert drivers to underinflation or overinflation via a dashboard warning light.
Functions:
- Read Tire Pressure and Sensor Data: Retrieves real-time pressure, temperature, and sensor battery status from TPMS sensors.
- Reset TPMS System: Clears TPMS warning lights after tire rotations, pressure adjustments, or sensor replacements.
- Program or Relearn Sensors: Configures new or replacement TPMS sensors to communicate with the vehicle’s system.
- Diagnose Issues: Identifies faulty sensors or communication problems.
Why It’s Essential for DIY Drivers:
- Tire Safety and Performance: Proper tire pressure improves fuel efficiency, tire longevity, and handling while reducing the risk of blowouts. A TPMS tool ensures accurate monitoring beyond manual gauges.
- Cost Savings: Avoids trips to a mechanic or tire shop for TPMS resets or diagnostics, which can cost $20–$50 per visit.
- Convenience: Allows DIY tire rotations or sensor replacements at home without needing dealership equipment.
- Versatility: Many tools work with multiple vehicle makes and models, making them a long-term investment.
Recommended Features:
- Compatibility: Ensure it supports your vehicle’s make, model, and TPMS type (direct or indirect).
- Ease of Use: Look for a user-friendly interface with clear instructions.
- Programming Capability: Choose a tool that can program aftermarket sensors if you plan to replace OEM sensors.
- Examples: Tools like the Autel MaxiTPMS TS401 or VXDAS EL-50448 are popular for DIY use (check compatibility).
Practical Use:
- Use after tire rotations, new tire installations, or seasonal tire swaps to reset the TPMS.
- Diagnose a TPMS warning light to determine if it’s a pressure issue or a faulty sensor.
- Program replacement sensors when installing new tires or wheels.
2. Battery Tester
What It Is: A battery tester is a device that measures the health, voltage, and charge of a vehicle’s battery, as well as the performance of the charging system (alternator) and starter.
If your car refuses to turn over, it may not just be the battery. Learn how to jump start a car safely before calling for help
Functions:
- Battery Health Check: Measures voltage, cold cranking amps (CCA), and state of charge to assess battery condition.
- Diagnose Charging System: Tests the alternator output to ensure it’s charging the battery properly.
- Starter Testing: Evaluates the starter motor’s draw to detect issues.
- Identify Issues: Detects weak batteries, overcharging, or alternator failures before they leave you stranded.
Why It’s Essential for DIY Drivers:
- Prevent Breakdowns: A failing battery or alternator can leave you stranded. Regular testing catches issues early.
- Cost Savings: Avoids unnecessary battery replacements by confirming whether the battery, alternator, or starter is the problem (dealership diagnostics can cost $50–$100).
- Ease of Use: Most testers are simple to use, requiring only a connection to the battery terminals.
- Versatility: Works on most 12V automotive batteries (lead-acid, AGM, etc.) and can test other vehicles like motorcycles or boats.
Recommended Features:
- Digital Display: Clear readouts for voltage, CCA, and health percentage.
- Wide CCA Range: Supports various battery types and sizes (check your battery’s CCA rating).
- Alternator/Starter Testing: Ensures comprehensive diagnostics.
- Examples: Tools like the FOXWELL BT100 or Ancel BST200 are affordable and reliable for DIY use.
Practical Use:
- Test the battery before long trips, in extreme weather (cold/heat stresses batteries), or if you notice slow cranking or dim lights.
- Check alternator output if the battery light is on or accessories malfunction.
- Use before replacing a battery to confirm it’s the issue, not the alternator or wiring.
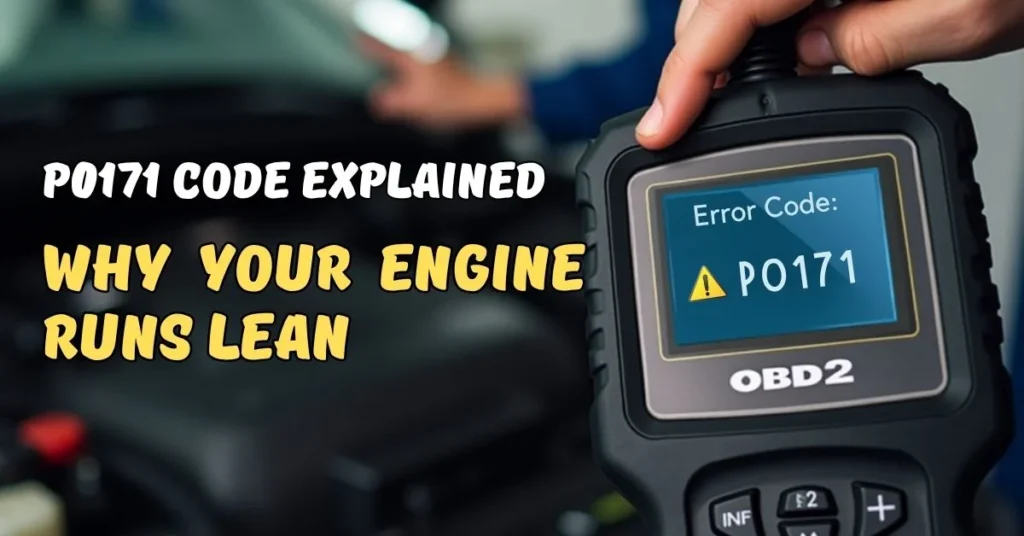
What Is P0171? And Why It is Important

The P0171 diagnostic trouble code (DTC) means “System Too Lean (Bank 1)” in a vehicle’s engine. It indicates that the engine control module (ECM) detects an air-fuel mixture in Bank 1 (the side of the engine with cylinder 1) that is too lean—too much air or too little fuel compared to the ideal ratio (typically 14.7:1 for gasoline engines). This can affect engine performance and, if ignored, may lead to damage.
Common Causes:
- Vacuum Leaks: Cracked intake manifold gaskets, vacuum hoses, or air intake boots letting in unmetered air.
- Faulty Mass Air Flow (MAF) Sensor: Dirty or defective, causing incorrect air measurement.
- Fuel Delivery Issues:
- Weak fuel pump or clogged fuel filter reducing fuel flow.
- Dirty or failing fuel injectors.
- Faulty fuel pressure regulator.
- Oxygen (O2) Sensor Problems: Malfunctioning upstream O2 sensor sending incorrect data.
- Air Intake Issues: Dirty air filter or restricted intake.
- Exhaust Leaks: Leaks before the O2 sensor introducing extra oxygen.
- PCV System Issues: Stuck-open PCV valve allowing excess air.
- Severe Engine Issues (Rare): Low compression from worn piston rings or damaged valves.
Symptoms:
- Check engine light on.
- Rough idle or stalling.
- Misfires or hesitation during acceleration.
- Poor fuel economy or weak performance.
- Hiss/sucking noise (vacuum leak).
Why It Matters:
A lean mixture can cause:
- Overheating, damaging pistons or cylinders.
- Detonation (knocking), stressing engine components.
- Catalytic converter damage from excess heat. In extreme cases, prolonged issues may require major repairs, but a new engine is rarely needed unless severe internal damage (e.g., low compression) is confirmed.
Diagnosis and Fixes:
- Scan Codes: Use an OBD-II scanner to confirm P0171 and check related codes.
- Check for Leaks: Inspect vacuum hoses and intake for leaks (use a smoke machine or carb cleaner).
- Clean/Replace MAF Sensor: Use MAF cleaner or replace if faulty.
- Test Fuel System: Check fuel pressure (30–60 psi, vehicle-specific), filter, and injectors.
- Inspect O2 Sensor: Monitor live data; replace if erratic.
- Check Air Filter/PCV Valve: Replace if dirty or faulty.
- Test Compression (if needed): Confirm engine health if other fixes fail.
- Clear Codes: Test drive after repairs to ensure the issue is resolved.
Repair Costs:
- Vacuum leak: $50–$200.
- MAF sensor: $20–$300.
- Fuel system: $100–$500.
- O2 sensor: $50–$250.
- Engine replacement (rare): $1,000–$7,000.
Prevention:
- Regular maintenance (filters, hoses, PCV valve).
- Use quality fuel to avoid injector issues.
- Address check engine lights promptly.
P0171 is usually fixable with simple repairs. Engine replacement is only needed if diagnostics (e.g., compression test) confirm severe damage, which is rare. If you have a specific vehicle or symptoms, share details for tailored advice! Not sure what specific make and model is your vehicle? Use our VIN Decoder Tool to find the right match instantly
Conclusion
Your car doesn’t last forever—but it can last a lot longer if you know what signs to watch for. Parts like the serpentine belt and brake lines seem small but have a massive impact. And tools like a TPMS tool or battery tester let you catch issues early.
But when the engine or transmission is just done? Buying a quality used engine or used transmission is often the smartest move. It’s cost-effective, environmentally friendly, and backed with warranty when you shop with us.Read our latest blog on Ford Maverick recall details to learn how safety concerns may impact thousands of drivers.
Is windshield wiper fluid flammable?
Yes, it can be. Windshield wiper fluid often contains methanol or ethanol, which are flammable. While it’s safe during normal use, high-alcohol blends, especially in hot conditions or near sparks, may pose a fire risk.
What is the average Jiffy Lube oil change price?
The Jiffy Lube oil change price typically ranges from:
– $45–$55 for conventional oil
– $60–$75 for synthetic blend
– $75–$90 for full synthetic
Prices may vary by location and vehicle type. In cities like Atlanta, rates may be slightly higher due to local factors.
What is a TPMS tool and do I need one?
A TPMS tool is used to read and program tire pressure sensors. It helps monitor tire pressure, improve fuel efficiency, and prevent premature transmission or engine stress caused by uneven tire wear.
What does code P0171 mean for my car?
The P0171 code means your engine is running too lean—getting too much air or not enough fuel. Common causes include vacuum leaks, dirty MAF sensors, or failing fuel injectors.
When should I replace my serpentine belt?
You should replace your serpentine belt every 60,000–100,000 miles, or sooner if you notice squealing noises, cracks, or accessory failures.


